Hi Ya Everyone!
Today is finally here and I'm so excited to be sharing my project with you. But first, a few details. If you didn't know there was a blog hop going on today called
All That Glitters - that's ok, it's easy for you to join in! At the bottom of my post you will see a whole list of the participating bloggers from beginning to end or we have a Next Blog button that you can simply click on to take you to the next blog. Just keep clicking on this from blog to blog until you come back to my blog! However, if you find yourself stuck somewhere just refer to the list and get back on track!

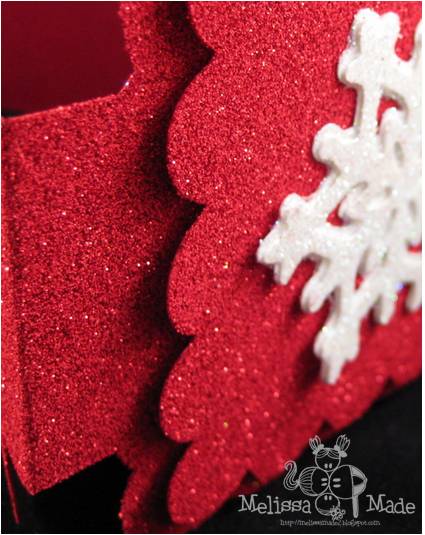
Now, on to my project. I decided my dining room table needed some sprucing up this Christmas! I have a number of red and white Christmas dishes and decided to add a centerpiece and some pretty candles. First, I didn't really craft anything for the glass sconce. I simply filled it with some pine cones, cinnamon sticks, and ornaments. Lastly, I added some soft glittery snow. My candles will stand on either side of my sconce. The candles looked extremely plain so I decided to make some "wraps" for when the candles are on the table unlit. I used MiniMonograms to cut out the scalloped squares, but first on my Gypsy I welded a few rectangles to each shadow feature of the scalloped square.

These are to act as fasteners because I wanted the shape to be somewhat triangle to fit around the candle. I also wanted them larger then a 12x12 piece so one would have to be adhered separate. The tabs allowed me to do this as well. Now, for the fun part, each piece was run through my Xyron upside down. For the red I used embossing powder that has a sparkle in it. Why might you ask?? It's SO much cheaper then glitter - and Michaels was all out of RED GLITTER!!! YUP! But, they turned out AMAZING with this stuff and honestly it was a little less messy.

My snowflakes were from Christmas cartridge and I chose to cover them in a very fine soft crystal glitter. Love this stuff because it has such a soft shimmery sparkle. I layered the shadow feature and the normal cut after running them through the Xyron and placed them on the scalloped square. Then I popped that square out from the shadow with the Pop Dots. Finally, I used my MS scoreboard and scored the tabs right in the center and attached the tabs together using my adhesive.
I love these - but will not use them with lit candles - I'm only demonstrating here and wanted my photos to look nice. DO NOT USE WITH LIT CANDLES - CANDLES CAN BURN DOWN AND CATCH THE PAPER ON FIRE!!! These are only for decorative appearance on my table when my candles are NOT lit!
Now, BLOG CANDY!!!
You do not have to be a follower to receive my blog candy. I would however love it if you followed because you enjoyed my project and my blog.
I would like you to leave a comment and I want
you to tell me what your favorite
Christmas present is and who gave it to you!
Please feel free to email me if you are making your own and have questions my email is right under my blog title. Now, HOP everyone and have a great time!!! Some bloggers will have posts each day of the hop and prizes for each of those days!!!! So have fun and stop by each day to see new things - you have until midnight on the 13th to leave a comment under the posts to be eligible for my blog candy! Now, head over to Sheila for an awesome, beautiful and fantastic project and tutorial!!!