Showing posts with label tutorial. Show all posts

Thursday, August 15, 2019

Sunshine You'll Always be Mine - LDRS Creative

Hello LDRS Creative fans and lovers!  Melissa here today to share an adorable card I made using the Puddle Jumpers Stamp Set and 6x6 Puddle Jumpers Paper!
I will walk you through making this simple and easy card using fabulous LDRS Creative products.  First, I stamped the ducks from the Puddle Jumpers Stamp set onto LDRS Creative Masking Paper.  I then fussy cut each duck out of the masking paper right on the black line of the image.
I then stamped the ducks with LDRS Creative Hybrid Ink in Raven onto a piece of paper in which I could watercolor.   I masked the two smallest ducks and stamped a cute umbrella over the little ducks to create a scene.
Then I watercolored my ducks with watercolor markers in blues and yellows to match the 6x6 Puddle Jumpers paper.  If you haven't tried any of the LDRS Creative papers, I highly recommend them.  They are very thick and have a great smooth texture.  The paper is high quality.  
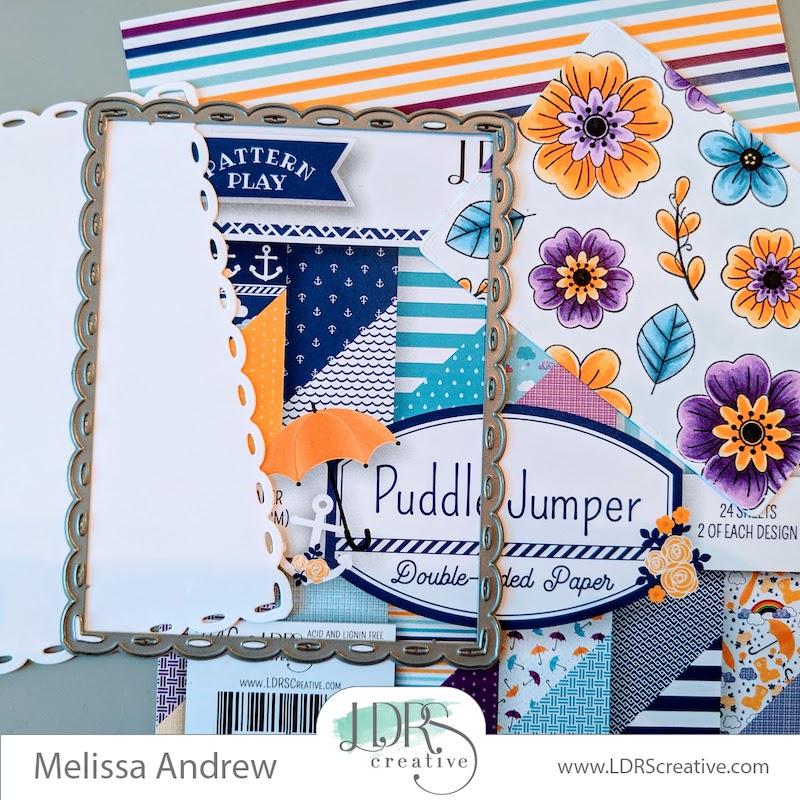
I then created a frame using the new Scalloped Rectangle Frame die set.  I chose the adorable raindrop paper from the Puddle Jumpers Paper set.
Last, I adhered the frame to the duck scene.  I popped this up on another piece of Puddle Jumpers paper.  I did add a sentiment from the Puddle Jumpers Stamp Set that says Sunshine You will Always Be Mine in LDRS Creative Hybrid Ink in Raven.
I love how this adorable card turned out.  With the LDRS Creative products available you can create a number of beautiful cards and projects.  
Make sure to join us again for more great tutorials and inspiration.  You can also find LDRS Creative on InstagramFacebook and YouTube!  Don't forget to stop by the shop and get all the latest stamps, dies, ink and more!

Friday, June 28, 2019

LDRS Creative Release Day 2 - Tutorial


Thank you for joining us on our LDRS Creative inspiration week blog hop!

Be ready for our amazing SUMMER CRITTERS collection! My oh my, this is probably one of our favorite releases EVER!

You can even see them in action with step-by-step projects by our amazing designers on their blogs and our own LDRS Creative Youtube channel (make sure you subscribe).

First come the fabulous new stamp sets; Beary Great DaySpot On, both from the Polkadoodles line, and  Dill With It. If you saw these on HSN, you'll be happy to know they're now in our regular store: Happy Everything, Stinkin' Amazing, Thank Ewe, Whale Wishes!

Tons of dies to create the perfect scenes: At The Beach Die, By the Sea Die, Here Comes The Sun Die Set, In A Cloudy Sky Die Set, In The Grass Die Set, Lil' Pink Houses Die, Rainbow Bits Die Set.

And basic dies to meet all your papercrafting needs? We say YES to BASICS: Practically Oval Frame Set, Scalloped Rectangle Frame Set.

Simply use the list at the end of the post to keep hopping!
 We are giving away a $50 LDRS Creative gift card to one lucky hopper! To enter leave a comment on each blog in the hop, plus follow us on Facebook and Instagram.  Make sure to visit our Instagram page, for a chance to win a fabulous bundle!


Winners will be announced on the LDRS Creative inspiration blog and Instagram page on July 2, 2019.

AND for the release event we are excited to offer some great savings!
Save 15% on the new Summer Critters release*, including already discounted bundles and use code JUNE15
(*Coupon valid until July 1, 2019, midnight EST)


Hop along and leave a comment so you could win!


Today, I used the adorable Stinkin' Amazing Stamp set.  Now, I love this set because it has so many adorable items in it.  I used a ton of different products.  So let me walk you though how I put this card together.


First, I stamped my flowers on this card panel I cut out with the die set Scalloped Rectangle Frame Set in Raven Hybrid Ink.  Then I colored each flower to match the adorable colors in the 6x6 Paper Pad Puddle Jumpers.


I did the same thing with the adorable skunk and colored him black and white with my Copics.


I then cut out a piece of white card stock with the larger die in the Scalloped Rectangle set.  Here you can also see the flowers colored to match the beautiful Puddle Jumper card stock.


Next, I used the oval from the die set to cut out an oval with my cute skunk attached.  To do this, I left the skunk and a portion of the oval die stinking out of my cutting plates to make sure he wouldn't get cut too!


I then added a sentiment to the oval.  Last, I adhered all my layers together!


Tuesday, April 10, 2018

April Paper Door from Whimsy Stamps

Hi ya everyone!  I'm super excited to tell you the next Paper Door Kit is now available at Whimsy Stamps!  I love this months kit.  The stamp set and the papers...wow luscious.   I created this card using a watercoloring technique.  If you purchase the Paper Door Kit you will receive the technique video I created to help you make the card you see above.

Here's a quick peak at what's in the new kit!


Depending on your home, here are the links for the kit!
https://whimsystamps.com/…/paper-door-canada-mexico-shipping
https://whimsystamps.com/…/paper-door-international-shipping
https://whimsystamps.com/products/paper-door-usa-shipping

Thursday, February 22, 2018

GooseBumps Texture Spray is AWESOME!!!


Hi ya everyone!  Today, I'm sharing on the Imagine YouTube channel how I created these beautiful cards using Goosebumps texture spray.  I love this stuff.  It works awesome with almost any other media.  I was able to create four unique cards with different sprays and inks!  I describe how I make each one in the video above!

Alcohol Inks

Fireworks Sprays

VersaMagic and Brilliance Inks with Watercoloring

VersaMagic Inks with the Dauber Method

Head over to the Imagine YouTube channel for more fun videos and don't forget to check out the blog for some amazing tutorials and projects!

Monday, February 20, 2012

Do you Kraft? A unique background on Kraft

Hi ya everyone - Sharing a simple tutorial on creating your own paper using Kraft at She's A Sassy Lady.  I colored this gorgeous Some Odd Girl beauty with my Copics.  I imagined her in a vivid red dress with luscious dark skin, so that's how I colored her.  I quickly realized I couldn't find any paper that matched however.  I decided to ink a background using a Spellbinders Impressabilities.  Here's how:
Thanks for watching my video and simple tutorial.  Many thanks to Sheila for allowing me to share on her blog - She's A Sassy Lady again today!

Wednesday, August 3, 2011

You're The Sweetest - Creative Critterz Imaginations

Hi ya everyone!  Today is my day at the Creative Critterz Imaginations blog and I'll be sharing a very cute critter card I made.
  Today I want to share with you a quick card I created using the Imagine and the Gypsy.  I love using these two products together.  I began with the following items:
In addition to these items:
Imagine
White 12 x 12 sheets of paper
Pearl Embellishments colored with R20 Copic
Pink Satin Ribbon
 After cutting and printing each piece on the Imagine and adding some simple embellishments, I adhered the layers for this final product.
If you have any questions or comments I would love to hear from you!

Monday, June 20, 2011

8 is GREAT!!! - Invite Tutorial

 Hi ya everyone!
  It's my turn to share a tutorial at She's A Sassy Lady today and I chose my daughter's invites as a project.
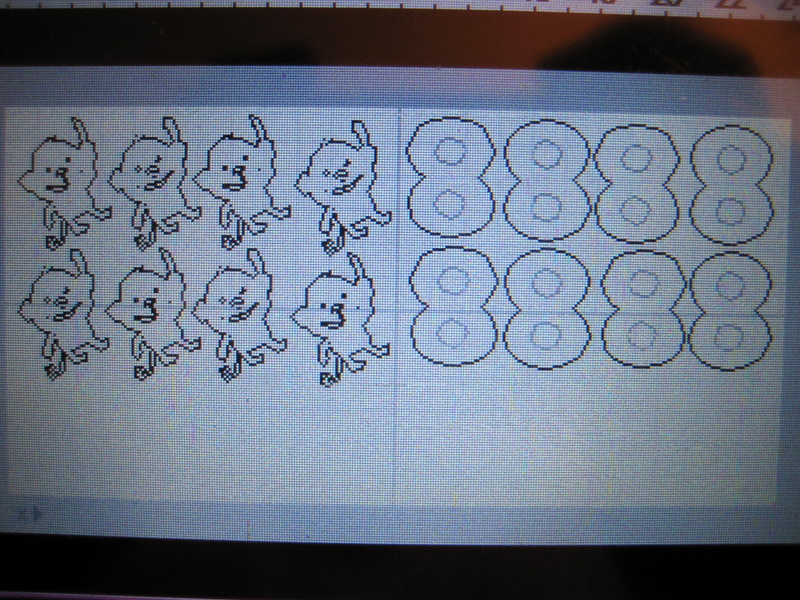
My sweet Anna is turning 8 this month and wanted a purple monkey cake - so specific for 8!  She also wanted monkey (Create A Critter) invites hanging from the number 8!  Again specific...she is all about the details! LOL - so I've decided to do a short tutorial on making single layer invites.  Instead of a card I wanted to make a flip over card basically because the monkey hanging from the 8 would be a little unsteady unless I placed it directly on a rectangle piece of paper.  I also like to use as little paper as possible.  I laid each element out on my Gypsy first and then split them up and made multiples.
Monkey Shadow (Brown Bazzil) and Monkey Front (Purple paper from Basic Grey stack Oh Baby! Girl)

Monkey Middle (Yellow Basic Grey stack Oh Baby! Girl and 8 backing in Green Basic Grey stack Oh Baby! Girl)
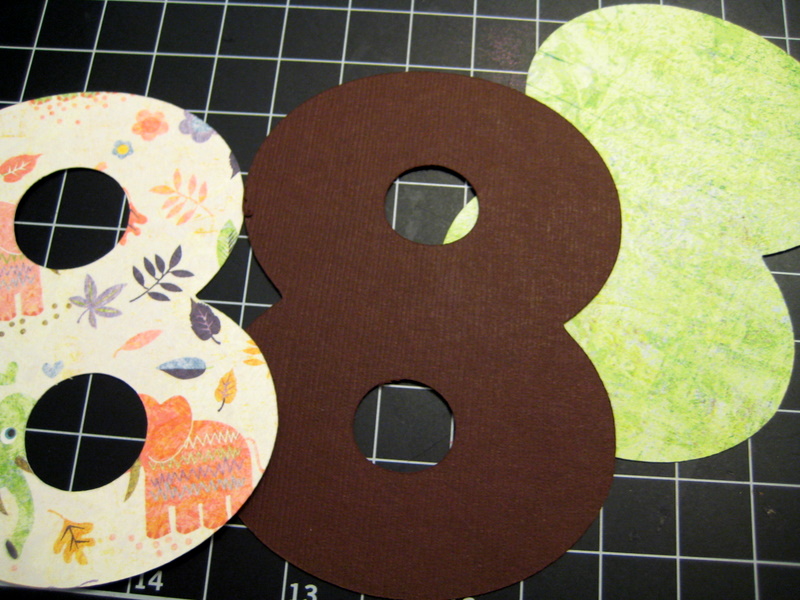
Front of 8 in Basic Grey elephant paper from Oh Baby! Girl stack and Brown Bazzil for shadow
I chose the following papers and cut out each card.
I also cut out an extra 8 with the holes shadowed for the information portion on the back.  Here are all the pieces cut and ready for assembly.
I adhered the 8 with my ATG.
I glued the top layer of the monkey onto the yellow paper and then adhered that to the shadow in brown using the ATG.

I then adhered the monkey to the 8 with glue and ATG.  I used both to make sure the two were adhered well together.
Sometimes I would use a bit too much ATG and it would hang over.
This is why I love the ATG I have because even though it's incredibly adhesive it can be rolled off gently.  I roll in slightly with my finger and then tear it off and use the glue ball to get any extra off.
Last, I grabbed my $1 Studio G stamp set, Versafine black ink and an acrylic block.
I lined up my stamps on the back of the invite first and then pressed the acrylic block to them.  I covered the stamps in black ink and stamped them to the invite! 
Thanks for checking out my tutorial!  I LOVE Comments and your encouragement is truly appreciated!

Monday, May 16, 2011

Simple Copic Coloring Tutorial

 Hi ya everyone! Today I am sharing a coloring tutorial at She's A Sassy Lady.  Thanks Sheila for letting me share again today on your blog. 
I've had a number of questions concerning my Copics lately and thought I would share a brief tutorial on coloring a simple image with a minimum number of markers.  We all know Copics are a bit expensive.  However, you definitely are paying for a great product and like other crafting products out there you get what you pay for.  This is not to say that buying a cheap pack of crayola markers is a bad idea - it's actually a good place to start to see if you will enjoy coloring.  So tip one - buy some inexpensive colored pencils or markers and see if you enjoy coloring.  I have a feeling you'll love it - it's extremely relaxing and very portable.  Ok, let's get started!

Choosing Paper and Printing - I print my image on a Laser Jet printer but you can use Ink Jet printers but you will either need special inks or a spray on sealer.  Paper is another question I get often.  This a personal preference as everyone will choose something a bit different.  For inexpensive Georgia Pacific 110lb. paper works well and can be found at the local grocery store or bix box store.  I've tried a number of other brands too but my all time favorite is X-Press it white.

Choosing an Image - You can either go digital or rubber/clear.  Personally, there are appeals to both but I prefer digital images only because I don't have to worry about storage of extra crafting products and I can change the size of the image to whatever I like.  For this tutorial I am using an adorable image from Tiddly Inks called June and she can be found HERE.
Choosing colors - I usually choose my marker colors as I go and then match my paper.  This is backwards - but I never said I was normal =).  Choosing your design paper first is a good idea because then you can match your markers.  A color chart of your markers/pencils is a great idea because then it's easy to match up design paper.  These are the colors I'm choosing for this image.  I would normally use more for an image but I wanted to show you that you don't need every marker out there to color a cute image.  Copics are numbered on the top - for example the reds I show here are from light to dark as follows: R20, R22, R24, R29.  Using Copics that are in a color family is a good idea as you will see in my tutorial.
The basics for coloring are all the same.  Start with a light shade, use a dark shade to add shadows, go over your dark shadows with a medium shade and go over the entire image again with the light shade. I don't always follow this rule as you will see and other wonderful artists don't either.  However, it's a good rule of thumb to start.

Coloring Skin - Coloring in small circles will help you blend your colors better and will reduce streaking.
1. Color area in light color
2. Color shaded areas in dark color
3. Cover dark ares with medium shade and extend a bit into lighter shade
4. Color over everything in light color.

Coloring Accessories
1. Cover entire area in light shade
2. Trim in medium shade
3. Add more depth with dark shade
4. Go over dark shade with medium shade
5. Cover entire image with light shade 

Coloring Clothes
1. Cover entire area in light shade
2. Trim in medium shade
3. Add more depth with dark shade
4. Go over dark shade with medium shade
5. Cover entire image with light shade
6. Added a bit more depth with medium shade
7. Covered entire area again with light shade

Coloring Hair - for hair I like to leave my white space in the very beginning to mark out where my hair will have some shine.  I will also start adding colors in the same direction I want her hair to go.  This gives the hair a more realistic look.
1. Cover entire area in light shade
2. Trim in medium shade
3. Add more depth with dark shade
4. Go over dark shade with medium shade
5. Cover entire image with light shade
6. Added a bit more depth with medium shade
7. Covered entire area again with light shade - not shown

Shoes and Accents - I color the shoes with only two shades and add some cute accents with a white gel role pen.
 Simple Background - You don't need to add a background but it might be fun.  This is a VERY SIMPLE background just adding small dots randomly with the Copics.
Finally, I mount the image on some Basic Grey paper from the Romani stack and make my card.  Here is a close-up of this Tiddly Ink image colored and mounted on my card.
Isn't she adorable?  Just remember to follow some basic rules and practice.  I learn something new with my markers everyday.
Please feel free to ask questions either in the comments section or send me an email.  I am not a Copic Certified instructor but enjoy showing others how I like to color my images.

Please stop by Sheila's blog at She's A Sassy Lady for more unique tutorials!!!