For this project you will need the following items:
Die Cut Maching
Tim Holtz Tag and Bookplates Die
Close to My Heart - Splendid Day stamp set
Close to My Heart - Dotty for You paper
Close to My Heart - Bohemian Assortment
Distress Inks - Shabby Shutters and Antique Linen
Versafine Black Onyx Ink
Fibers - such as twine
Hi ya everyone! Today I'm sharing a simple airplane card I made using Copic Various Inks and Close To My Heart stamps that I purchased from Sheila at She's A Sassy Lady. Sheila is now a Close To My Heart representative and so I ordered my very first set from her to give them a go! I really love the quality of these stamps. Sometimes when you purchase clear polymer stamps the quality is poor and your stamped image comes out blurry or not complete. I have to say these stamps are fabulous!
I also used my Copic Various Inks in a spritz bottle to create a cloud background for this card. Various Inks are fabulous for spritzing like this because they are alcohol based and dry quickly. This is great because your papers won't crinkle or warp like water based inks. I show you how in the following video!
Items used: CTMH Summer Set - Splendid DayCopic Various Inks - B000 and B0000 Spritz bottle White paper - for background, card base and for cutting out cloud shapes Cutter Bee Scissors Designer Paper - My Mind's Eye - Happier Black Ink - I used Versafine Onyx BlackAdhesive
Thanks for watching today! If you'd like more fun projects please visit She's A Sassy Lady. Have questions? Ask in the comments below!
Hi ya everyone - Sharing a simple tutorial on creating your own paper using Kraft at She's A Sassy Lady. I colored this gorgeous Some Odd Girl beauty with my Copics. I imagined her in a vivid red dress with luscious dark skin, so that's how I colored her. I quickly realized I couldn't find any paper that matched however. I decided to ink a background using a Spellbinders Impressabilities. Here's how:
Thanks for watching my video and simple tutorial. Many thanks to Sheila for allowing me to share on her blog - She's A Sassy Lady again today!
Hi ya everyone! I'm sharing a tutorial at She's A Sassy Lady. Today I want to share with you how I made this simple Valentine's Day Card. More specifically how I created these little flowers using Washi tape that I received from iCopic. Washi tape is extrememly cheap and comes in a huge range of colors. It can be used for a number of things but in this tutorial I show you how to make these small roses.
For those that don't like to watch videos you simply unroll over a foot or so of Washi tape and roll it and twist it long ways in your hands. Use a pair of tweezers and start rolling around the tweezers to form the spiral shown on the card. Once you are finished place a pearl in the center and then add a bit of glitter to make it sparkle. I also used my Cuttlebug to create the leaves using Spellbinders Shapebilities.
The sentiment is from Sassy Lady's designer very own, Kimberly from My Craft Spot. I hope enjoyed this simple tutorial. I look forward to hearing your lovely comments! For more fun projects stop by She's A Sassy Lady!
Hi ya everyone! Today is my day to share at She's A Sassy Lady. I'm sharing with you one of my favorite products and a tutorial on how to make these simple felt flowers. Thanks Sheila for letting me share today this easy tutorial.
I hope you enjoyed this simple tutorial. I'll be sharing more of my favorite projects with the Spellbinder Nestables. Please visit She's A Sassy Lady for more fun projects! Don't forget to leave a comment - I love to hear from you and if you have any questions - ask away!
Hi ya everyone! Today I am sharing at She's A Sassy Lady. I loved these Cris-Cross Cards as soon as I saw them. They are very simple to make and are a great size for Christmas and gift cards.
Here's how I did it:
For those of you that don't like to watch videos - here are the dimensions to make the Cris-Cross card. Card Envelope
2 - base cards - 5.5inch square - cut fronts at diagonals - one bottom right to top left and one bottom left to top right.
1- square cut at 5.25inch square and cut on the diagonal
2 - square cut at 5 inch square and cut on the diagonal in different patterned papers Insert piece
1 - 5.25 square in solid card stock
1 - 5 inch square in patterned
1 - 4.75 inch square in solid white
I hope you enjoyed this simple card tutorial. Please feel free to leave comments and ask questions! I love to hear from you! For more fun projects please come by She's A Sassy Lady.
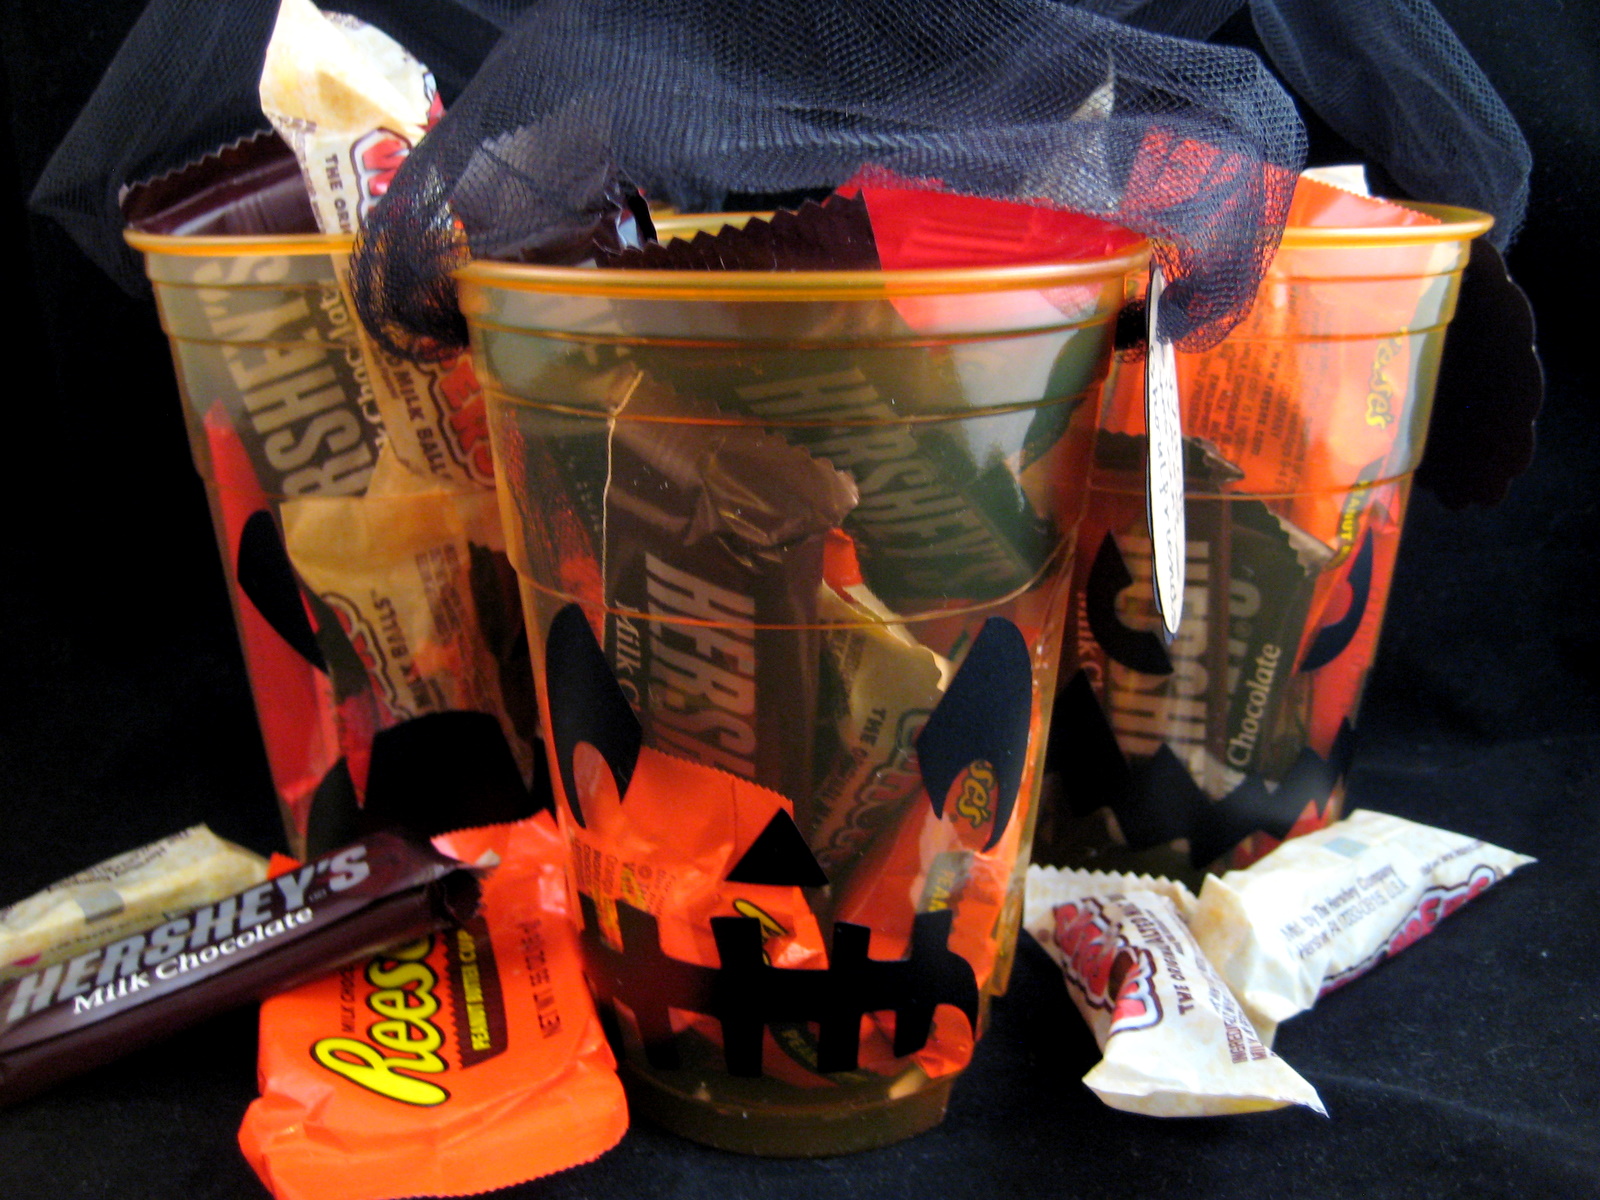
Hi ya everyone today is my day to share at She's A Sassy Lady! I have a simple and easy project for you. I needed some simple table decor for a fun crafty weekend I went to and wanted to add a little treat for everyone. These cups were inexpensive and the vinyl adhered to them perfectly. Here's how I did this fun project using Cricut Craft Room
Easy and inexpensive right? Thanks to the fabulous Sheila of She's A Sassy Lady for letting me share with you today!
Have a great day! Please ask questions in the comment area - and I LOVE comments too! Thanks for stopping by today. You'll find more fun projects at She's A Sassy Lady.
Hi ya everyone! Today is my day to share at She's A Sassy Lady! Thanks Sheila for allowing me to share again today! I wanted to finish this tutorial before I went on vacation and thought I would share some very simple techniques that will help you save time when creating your cards and maybe even space in your craft area.
Thanks for watching my video today. I love to hear comments and please feel free to ask any questions! You can find more projects and tutorials at She's A Sassy Lady.
Hi ya everyone today is the day for me to share at She's A Sassy Lady. I've been using my Imagine a bit lately because my Expressions conked out on me. I have to admit I'm loving this machine and even have managed to get a few more carts for it. Today, I thought I would help those that love their Gypsy and have yet to use it with their Imagine.
First, here's a quick video on how to attach your Imagine Cartridges to your Gypsy once you have the application installed. I apologize for the video quality - it's a bit blurry as I typically don't do videos - but it's clear enough to understand.
Now, let's learn how to use the Gypsy with the new cartridges that you've attached.
First, select the Imagine application on your Gypsy. For this project I chose the print and cut button.
On the bottom left hand side of the screen you should now see three little icons. The first is your basic cricut cartridges. The second is the imagine itself that comes preloaded with a few fun shapes. Last, is the list of your Imagine cartridges. I chose this icon to select the paper I wanted.
I wanted to use the Audrey Imagine Cartridge for this project.
Because the Audrey cartridge is a pattern only cartridge it takes me to this next screen.
I tap on this screen to select this cartridge. Next, I choose the cricut cartridge I want to work from.
For this card I wanted to use Cindy Loo. I scrolled down the list until I got to Cindy Loo and selected it by tapping on the cartridge.
Once you choose the cartridge the screen will appear that's a replicate of the keypad. I chose the frame option.
I then chose the little frame with the birdhouse on the bottom right corner.
Once I selected the frame it comes up at the top of the screen in the bar. In this bar I tapped on the frame I chose and the edit button appears. Here you can do three things. Edit with the pencil tool, duplicate with the squares at the bottom and also the remove button which is the red circle.
I chose the edit button - the pencil by gently tapping on it. On this screen I can add my pattern paper to my image. I clicked on the blue pattern.
Once the pattern was added I decided to change the size to fit on my A2 sized card. In the above picture you can see the little + and - with numbers on each side. I touch the + to increase the size and the - to decrease the size. This is fabulous because once you change the frame size any extra additions such as the layers for the house will automatically be the correct size.
I then chose the imagine icon at the bottom to go to those great extra shapes that come preloaded.
I chose this square for some patterned matching paper.
I chose a red pattern and then clicked next. I then chose the duplicate square after gently tapping on the square in the bar.
Once I duplicated the square I chose the duplicate and changed the pattern. I chose the next button on the screen and could then see each page that would need to be print and cut. Here are three pages. They are viewed starting with the last page and you can scroll back to see each page. When you go to print and cut they will print in order page 1 to page 3.
As you can see on the first page I added a few elements following the same directions as before. I will often click back and forth between these pages to see the size of the images I'm adding. Once I am ready to print I hit the next button.
The screen will then direct me load the mat and away it goes. I decided to make a second card as well with the left over bird and I did print some extra paper.
I added a sentiment from Straight from the Next too. Thanks for checking out my tutorial today and for more fun projects stop by She's A Sassy Lady.
Please leave comments and ask questions below!! I love to hear from you!
Hi ya everyone!
Sheila at She's A Sassy Lady does a weekly Gypsy Made Simple tutorial where she teaches all kinds of wonderful things on how to use that Fabulous Little Lady we call the Gypsy! She is asking that everyone simply attach a project made with the Gypsy to the linky right HERE. This will help others who are beginning to use the Gypsy not only learn but also become inspired by what it can do. Sadly, I lost a very close friend last week and that was my Expressions!!! She is not doing to well - my mat is NOT feeding properly. Alas, no worries as I do have an Imagine and I'm learning so much. I used Doodlecharms (watermelon cut), Straight From the Nest (summer cut) and Best Friends (paper patterns). I designed this on my Gypsy first using the Imagine application! Hop on over to She's A Sassy Lady and see what everyone has been up to!
Hi ya everyone - I'm going to be at She's A Sassy Lady and The Bug Bytes today! So I have to take time out to thank Sheila and Pam for letting me share with you all today!
I started my project with these three little plaques I bought for $1 a piece at my local craft store that's going out of business! First, I painted the edges with white acrylic paint. Once it dried I sanded the edges up a bit for a more distressed look.
Next, I chose these FABULOUS papers from the Butterfly Garden Collection and measured my plaque to be 5 1/4 inch across. I cut the papers on my paper cutter to this size.
I needed to punch wholes in my paper before adhereing. The easiest way to do this is to place my paper where I want it flip the plaque over and draw the circles through the wholes with a pencil. Then I remove the paper and use my crop-o-dile to punch the holes. I used my ATG to adhere the paper making sure the edges of the paper were COVERED with adhesive so no edges would peel up.
I grabbed my Tim Holtz weathered wood distress ink, my clear acrylic block, and my Tim Holtz clear stamps from the Visual Artistry collection. I coated my stamps and placed the swirls in different places on the paper.
I then chose the bird and stamped the same in the bottom corner of each plaque.
I placed my plaques to the side and picked up my Gypsy! I used the Mothers Day Bouquet cartridge and the Gypsy font cart to make flowers and the lettering for Live Laugh and Love. I chose more papers from the same collection as above. I glued the letters together with some Tombo glue and allowed them to dry.
I then made flowers by using the little ball tool to slightly curl the flowers downward. I layered two flowers using my Glossy Accents and sliced a small whole in some for a tiny brad. For others I used pearls to make the center - placing a large one in the middle and little ones along the outside.
I added a few pearl accents to the plaques and a shear ribbon through each set of wholes for hanging.
I hope you enjoyed my tutorial. I love comments and encourage you to ask questions if you have them! Please stop by She's A Sassy Lady and The Bug Bytes for more fun projects!
Hi ya everyone!
It's my turn to share a tutorial at She's A Sassy Lady today and I chose my daughter's invites as a project.
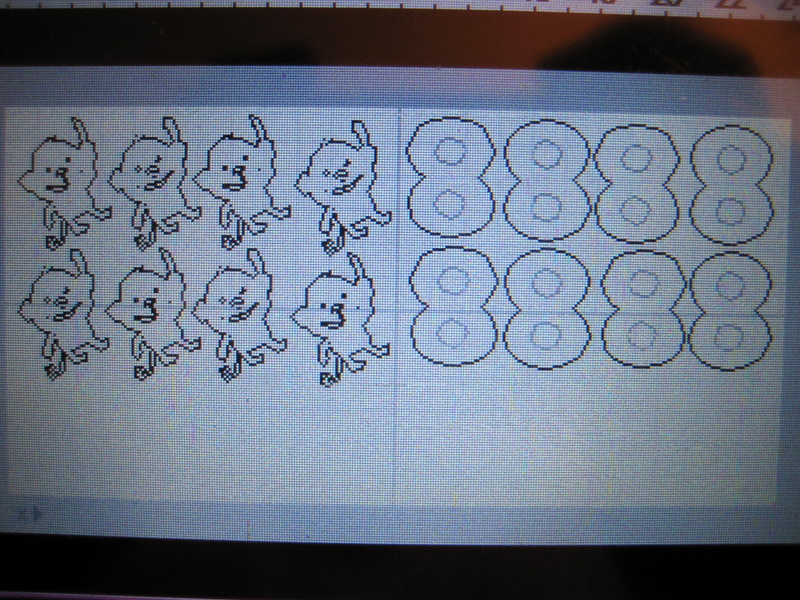
My sweet Anna is turning 8 this month and wanted a purple monkey cake - so specific for 8! She also wanted monkey (Create A Critter) invites hanging from the number 8! Again specific...she is all about the details! LOL - so I've decided to do a short tutorial on making single layer invites. Instead of a card I wanted to make a flip over card basically because the monkey hanging from the 8 would be a little unsteady unless I placed it directly on a rectangle piece of paper. I also like to use as little paper as possible. I laid each element out on my Gypsy first and then split them up and made multiples.
Monkey Shadow (Brown Bazzil) and Monkey Front (Purple paper from Basic Grey stack Oh Baby! Girl)
Monkey Middle (Yellow Basic Grey stack Oh Baby! Girl and 8 backing in Green Basic Grey stack Oh Baby! Girl)
Front of 8 in Basic Grey elephant paper from Oh Baby! Girl stack and Brown Bazzil for shadow
I chose the following papers and cut out each card.
I also cut out an extra 8 with the holes shadowed for the information portion on the back. Here are all the pieces cut and ready for assembly.
I adhered the 8 with my ATG.
I glued the top layer of the monkey onto the yellow paper and then adhered that to the shadow in brown using the ATG.
I then adhered the monkey to the 8 with glue and ATG. I used both to make sure the two were adhered well together.
Sometimes I would use a bit too much ATG and it would hang over.
This is why I love the ATG I have because even though it's incredibly adhesive it can be rolled off gently. I roll in slightly with my finger and then tear it off and use the glue ball to get any extra off.
Last, I grabbed my $1 Studio G stamp set, Versafine black ink and an acrylic block.
I lined up my stamps on the back of the invite first and then pressed the acrylic block to them. I covered the stamps in black ink and stamped them to the invite!
Thanks for checking out my tutorial! I LOVE Comments and your encouragement is truly appreciated!