Showing posts with label The Bug Bytes. Show all posts

Tuesday, July 24, 2012

Shaped Card fun and Tiddly Inks!


Hi ya everyone!
Today I'm sharing at The Bug Bytes a simple shaped card I made with the adorable new stamps from Tiddly Inks.  The set is called Hang in There and features a little girl hanging upside down in a tree.  However, I used some of the accents to create this card with my Cuttlebug and a few Spellbinders Dies.  I created a simple video for you too I hope you enjoy!

In addition Tiddly Inks is having a GORGEOUS new release today called Fantasy Friends!  Please scroll down to my next post to see those!  Here's a sneaky of one creation I made!


Tuesday, March 27, 2012

Distress Inks and Stamping

Hi ya everyone! I am sharing with you a brief tutorial on using Distress Inks to paint an image at The Bug Bytes today.  I've made a video tutorial to share with you, but first I will share with you the supplied I used to create this fun card.  All supplies were purchased/supplied at iCopic and from Sheila a Close to My Heart representative. Supplies: Distress Inks - Broken China, Mustard Seed, Peeled Paint and Spiced Marmalade Staz-On Paper - Ranger Inkssentials and My Mind's Eye - Stella Rose Water filled brush Adhesive Twine Stamps - Close to My Heart - A Garden
This paper from Ranger worked amazingly with the Distress Inks.  The paper didn't pucker or change at all!  This is amazing really as even watercolor paper changes a bit. 
 This is a very easy technique and can be fun and add a unique twist to your artwork! For more fun projects please visit The Bug Bytes!

Tuesday, February 28, 2012

Copic Airbrush and Colorless Blender Together

 If you are looking for my Tiddly Inks Challenge card scroll down! 
Hi ya everyone!  Today I'm sharing at The Bug Bytes.  Anyone that follows my blog or knows me personally understands my love for Copics.
( Copic colors used for project)
I've found one more way to enjoy them as well and that's using the Airbrush System (ABS 1) and Copics.
 (ABS 1 System can be purchased at iCopic)
 I really want to purchase an air compressor for use with the airbrush but still haven't bitten the bullet.  This tutorial will show you a simple way to make a fun background for your cards.
 (Tiddly Inks image Donna)
Using Copics with a background allows you to color your image using the same colors so that everything matches perfectly!
I hope you enjoyed this brief tutorial.  If you have any questions please feel free to ask in the comments section.  For more fun projects visit The Bug Bytes.
Thank you!

Tuesday, January 24, 2012

Creating Shaped Cards with Spellbinders Nestabilities!

Hi ya everyone! I am sharing at The Bug Bytes today!  I have an easy tutorial on how to create shaped cards like the one above using a die-cut such as the Spellbinder Nestabilities.  I created a video below.  I also made an adorable circle card using the same technique, a Tiddly Inks digital stamp, and Card Patterns sketch
For those that don't like videos.  Simply take a folder piece of paper and attach the die above the fold and tape before cutting in you machine.  Here is the other card I created using this technique.
I hope you enjoyed this simple tutorial.  It's really a simple and easy way to create cards without having an expensive die-cut machine.  If you have any questions or comments please feel free to ask in the comments section!  For more fun projects please visit Pam at The Bug Bytes.
I'm entering the card in the Card Patterns Challenge this week!

Saturday, December 10, 2011

Holiday Blog Hop

Hi ya everyone!  Welcome to The Holiday Blog Hop!  You should have arrived here from Denine's blog!  Wasn't her project gorgeous!?  As you can see I created an album and a card.  I really love this paper by Bo Bunny.  I didn't want to do anything too overwhelming as the paper really is vintage and gorgeous! I started with the card first.
The paper was just so wonderful I decided to alter a three ring recipe book I got for $1 at Michaels.  I took all the paper off the outside and re-adhered the Bo Bunny Paper.  I then added a number of gorgeous embellishments from KarlaS001 etsy shop.  I love all her gorgeous yummies!
 Last, but certainly not least!! I recently won a fabulous iRock from the Echo Park Co!!! I LOVE Echo Park paper and well I already have an iRock - so I thought I would pay it forward and send it to one of my followers that leave a lovely comment today!!!
Now you are on to the wonderful Allison's blog!!!  Your last stop in the hop!  Thanks for stopping by today

Tuesday, November 22, 2011

A Christmas Treat Jar - The Bug Bytes

If you are looking for my Tiddly Inks post please scroll down!
Hi ya everyone! Today I'm sharing a short tutorial on how to create a fun holiday jar at The Bug Bytes.  Thanks Pam for letting me share on your blog today!  I like to have these back for little gifts for those that are important to me.  Though it's hard to see in the picture above I did etch the glass.  Please watch the video to see how to create this simple and fun project.
Thanks for watching - please visit The Bug Bytes for more fun projects!  Here's a close-up of the jar top with the sparkly napkin.
For any of the products mentioned in the video please visit my YouTube site right HERE.  Below you will find each company's product.
If you have any questions or comments please do so in the comment section - I love to hear from you!

Tuesday, October 25, 2011

Live, Dream, Be Happy - Accordian Fold

 Hi ya everyone!  If you are looking for my Tiddly Inks post please scroll down!!!
  I am sharing at The Bug Bytes today!  I first saw this on Splitcoaststampers and couldn't wait to try it myself.  In fact, I have made three now - this one is a bit more masculine.
Here is my tutorial.  In the tutorial I talk about the sizes of paper and how to assemble this accordion fold card.  The image see above is a Tiddly Inks image called Lillie Claire Bouquet and can be found right HERE.
I hope you enjoyed my tutorial and project.  Please feel free to ask questions or leave comments!  You know we LOVE to hear from you! 
All Images can be found at Tiddly Inks
 A more masculine version of the Accordion Fold
For more fun projects visit The Bug Bytes.
Thanks and have a great day!

Tuesday, August 23, 2011

Milk Carton - Back To School

Hi ya everyone!  If you are looking for my Tiddly Post please click HERE.  I'm sharing this milk carton tutorial using the Imagine at The Bug Bytes today!  Thanks so much Pam for letting me share this project.  My daughter goes back to school soon and I wanted to sneak a special treat in her lunch box.  I made this container using her favorite colors!  She's also really loving the goth stuff - so I chose this little Cutie Skull from Meljen's Designs to put on the side.
Once I had the scoring finished, I simply adhered all sides of the carton.  I started with the small flap and placed a small strip of adhesive down the side.
I formed the base of the box by adhering that flap to the inside of the other flap.
I then folded in the bottom and placed adhesive there as well starting with two opposing flaps and then the other two.
Once this was done the rest was easy.  The score lines worked perfectly for forming the top portion of the milk carton.
Next, I printed my Meljen's Designs Cutie Skull out and used the Cuttle Bug to cut and emboss.  For the first cut I used a circle nestable from Spellbinders and taped it to the paper so it wouldn't shift going through the Bug.  I also used the A plate, B plate and the C plate.
I then wanted to emboss the edge of the circle so I ran it through the Cuttle Bug again using an A plate, an embossing mat, three thick pieces of cardstock and two B plates.
This gave me a fabulous embossed edge.
I colored the skull using the following Copics.
I punched wholes in the top and ran some Tulle through and a black and white gingham ribbon.  I LOVE using tulle on my projects and saw this first in this post from Kristy at She's A Sassy Lady!


Thanks for stopping by today!  Please feel free to ask questions!

Tuesday, July 5, 2011

Live, Laugh, Love - Shabby Chic Wall Hangings

Hi ya everyone - I'm going to be at She's A Sassy Lady and The Bug Bytes today!  So I have to take time out to thank Sheila and Pam for letting me share with you all today!
I started my project with these three little plaques I bought for $1 a piece at my local craft store that's going out of business!  First, I painted the edges with white acrylic paint.  Once it dried I sanded the edges up a bit for a more distressed look.
Next, I chose these FABULOUS papers from the Butterfly Garden Collection and measured my plaque to be 5 1/4 inch across.  I cut the papers on my paper cutter to this size.
I needed to punch wholes in my paper before adhereing.  The easiest way to do this is to place my paper where I want it flip the plaque over and draw the circles through the wholes with a pencil.  Then I remove the paper and use my crop-o-dile to punch the holes.  I used my ATG to adhere the paper making sure the edges of the paper were COVERED with adhesive so no edges would peel up.
I grabbed my Tim Holtz weathered wood distress ink, my clear acrylic block, and my Tim Holtz clear stamps from the Visual Artistry collection.  I coated my stamps and placed the swirls in different places on the paper.
I then chose the bird and stamped the same in the bottom corner of each plaque.
I placed my plaques to the side and picked up my Gypsy!  I used the Mothers Day Bouquet cartridge and the Gypsy font cart to make flowers and the lettering for Live Laugh and Love.  I chose more papers from the same collection as above.  I glued the letters together with some Tombo glue and allowed them to dry.
I then made flowers by using the little ball tool to slightly curl the flowers downward.  I layered two flowers using my Glossy Accents and sliced a small whole in some for a tiny brad.  For others I used pearls to make the center - placing a large one in the middle and little ones along the outside.
I added a few pearl accents to the plaques and a shear ribbon through each set of wholes for hanging.
I hope you enjoyed my tutorial. I love comments and encourage you to ask questions if you have them!  Please stop by She's A Sassy Lady and The Bug Bytes for more fun projects!

Tuesday, February 8, 2011

Love Tickets - A mini album


Hi ya everyone!  If you are looking for my Tiddly Inks post please scroll down to the next post!
Today is my first time posting for Pam at The Bug Bytes !  Thank you so much Pam for letting me share with everyone today on your wonderful blog!  
Today, I want to share a little mini album with little tickets that I made for my husband for Valentine's Day!  This was inspired by Donna Mundinger's mini album found here.  Donna's is gorgeous - I wanted something a bit less fancy since my this is for my hubs and he's a pretty simple guy!  
Here is how I did it!
First, I started with five sheets of white paper sized at 5 1/2 inch x 4 1/4 inch. 
Next, I took my roller, a Cuttlebug Heart embossing folder and my Tim Holtz Brick Red Ink.
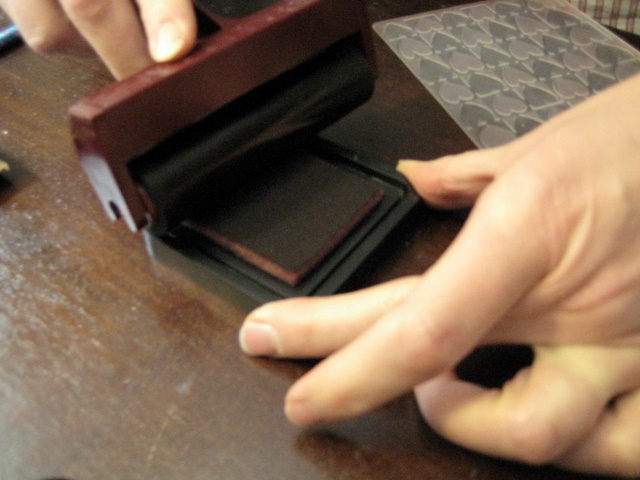
Roll the roller right through the ink as shown.
Roll the inked roller on one side of the embossing folder.
Make sure you cover one entire side of the embossing folder.
Next, place your sheet of paper cut at 5 1/2 x 4 1/4 inch in your inked embossing folder on the opposite side if the ink.
I used my A plate and two B plates and placed the folder between the A and B plates and ran these through my Cuddlebug.
This is my final sheet after inking and running through the CuddleBug - I did five just like this.
I took five empty roles of toilet paper and flattened them in a book prior to starting this project.  I wrapped each toilet paper role in the embossed paper by adhereing with my ATG gun as shown.


Again, I repeated this five times to cover each toilet paper roll.
Next, I got my Gypsy and cut tags that would fit in these roles. 
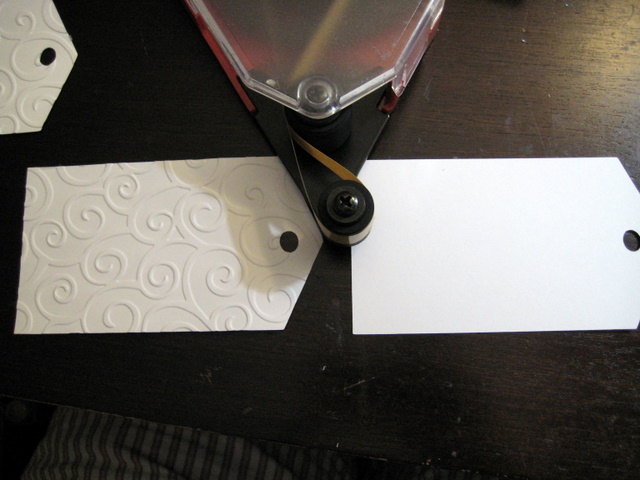
I cut two tags for each roll for a total of 10 tags - I did this to have very sturdy tags.  Next, I embossed one side with my Divine Swirls folder and attached the two with my ATG gun.
I added a bit of silky red ribbon to each edge of the pocket.
Next, I computer generated a number of things I wanted to do for my husband for Valentine's Day.  Each one of these was going to be placed on a ticket and slipped into the little holder.  I then used my oval Nestable to cut out the sentiments.
First, I taped down the nestable so that the sentiment was centered in the nestable.  Then I placed my A and C plate in my Cuddlebug.  I placed my nestable taped to my sentiment upside down so the cutting side was up.  I placed my B plate on top and ran through my CuddleBug.
Next, I embossed the edge of the oval nestable.  I left the cut piece in the oval flipped upside down.  I placed a rubber embossing mat on top.
Next, I placed three thick pieces of cardstock and a B plate and again ran through my Cuddlebug.
See the gorgeous edge my nestable creates.  I love this look!
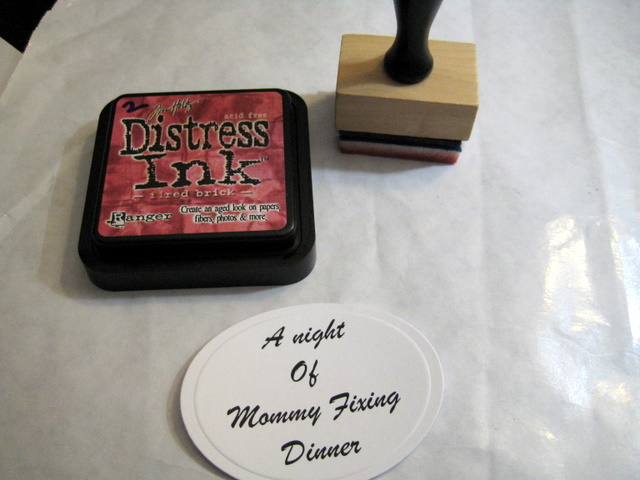
I took my Red Brick Tim Holtz ink again and inked the outside edge of each oval by working in a circular motion starting a my craft mat (wax paper) and slowly working into the tag.
Once my sentiments were inked and my tags prepared I glued the sentiments to the tags.

Then I finished the tags with a red silky ribbon.
I used my Cropodile to punch a hole through all five corners and looped a ring through.
Finally, I finished using my silky red ribbon and a sheer white ribbon.
I hope you enjoyed my project. Please check out Pam's blog at The Bug Bytes to see more fun projects!  Thanks Pam for allowing me to share today!