Showing posts with label Thank You. Show all posts

Tuesday, December 8, 2020

Thanks with Catherine Pooler Designs new release!


Tomorrow is the day ya'll!  Aren't you so excited for the new Catherine Pooler Designs release!  I absolutely adore all the products from this release...from cute cocktails to beautiful sentiments.

I created this card using the beautiful Classy Trims stamp set and the fabulous must have Sincere Thanks stamp set.  The florals/leaves were colored with Copics to match the beautiful new sequin mix called Manhattan!  The background paper was inked with Cranberry Fizz using the direct to paper technique.

You can find all the new products HERE.

Thursday, April 19, 2018

Paper Door at Whimsy Stamps - LAST CHANCE


Hi ya everyone!!!  I want to share this card I made using the new Paper Door Kit from Whimsy Stamps!  There are so many amazing goodies in this kit including distress markers, a gorgeous embossing folder, sequence and a beautiful stamp set.  Today I create this card an have a full video showing you how I created it using the distress markers that come in the kit!  I also do a bit of Copic coloring.  


You can purchase the new Paper Door Kit by clicking on the Product list below!

Products Used:


Wednesday, February 21, 2018

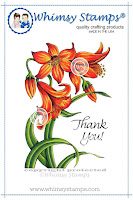
Easter Lily - Introducing DoveArt to Whimsy Stamps


Hi ya everyone!  I was super excited about the news that Jennifer Dove was going to be designing and selling her line of stamps at Whimsy!  She has gorgeous natural designs that are so simple to color.   The best part, if you're a novice these stamps are great at helping you find areas you should shadow.  Also, if you are an advanced Copic user you can add your own details.

I found some gorgeous Lily's online that had this color scheme and decided to give it a shot!  I think they turned out beautiful.  To see the whole DoveArts line head to Whimsy Stamps!

Products Used:
https://whimsystamps.com/collections/doveart/products/flower-lily?aff=6

Wednesday, January 17, 2018

Thank You card for Imagine


Hi ya everyone!  Sorry for my absence.  Myself and my family have been very sick the last few weeks!  I think we are on the mend finally.  Keeping my fingers crossed anyhow.

Today, I'm sharing with you a card for my Artist in Residence spot for Imagine!  I love this team and the products I get to work with.  You might be thinking to yourself, I don't know who Imagine is, but you probably due as they distribute products from Tsukineko like Versafine and Memento Inks.  You might not know however, that they have so many wonderful products of their own too.  I'm on their blog today, sharing how I made the above card.

I also made a video on the process.  You can watch that video below!  Please head over to the Imagine blog and leave some love too!


Tuesday, September 19, 2017

Kindness is Contagious - Whimsy Fundraiser


Hi ya everyone!
Today, I am sharing something special.  The wonderful owner of Whimsy Stamps, Denise, is putting together a stamp set to help those in Florida affected by the hurricane.  Many parts of Florida were devastated and people need help to rebuild. When you pre-order the stamp set, Helping Hands, below you will be directly contributing to charities in need. 


*PREORDER - Helping Hands
I created a little note card set with two of the stamps in this set.  The sentiments allow for a quick and simple way to create sweet cards with little to no work.  It's a great set for making thank you notes or teacher cards.  

Please, if you want to help those in Florida and receive an adorable stamp set from Whimsy, head to the shop now and pre-order yours today!

Tuesday, August 9, 2011

Tiddly Inks - Teacher Thank You - Aug. 8th

Hi ya everyone!
  This week at the Tiddly Inks Challenge blog we are asking you to thank a very important person in any child's life and that's their teacher!!!  I love celebrating teachers.  I chose these two images from the Teachers Change the World Set.
I put together a simple card using DCWV paper.  Please stop by Tiddly Inks and check out the new images too!  Christy has some adorable school images for this challenge! 

Wednesday, June 15, 2011

A Thank You

Materials:
Design Paper - K & Company Susan Winget Spring Blossom
Solid Green Paper and Kraft Paper
Rubber Stamp - Lili of the Valley - Born to Shop
Clear Thank You sentiment
Spellbinders Nestabilities - Labels 12
Flower - Yellow felt created by me using button and twine
Brown Bakers Twine - My Craft Spot
Markers - Copic Sketch
White Gelly Role Pen - Sakura
  Hi ya everyone!
  Just a quick little card I created using an adorable stamp from a friend!!  I love this cute little bear from Lili of the Valley and had so much fun coloring her.  I used my Copics of course and topped her off with some white accents.  I also added a bit of colorless blending solution to the inside of a CLEAN old sock and gently touched down on the bears fur for a fluffy appearance.
I used my labels 12 nestables and cut her and an accent in green.  I then layered on this gorgeous paper from K& Co.  Wrapped a bit of twine around and added a little tag with the sentiment.  I also created this little yellow flower from some felt I have in my stash.
I hope my friend likes her thank you card!!!  
 Care about my Copics?
Challenges: Make My Monday - Die Cut Flowers

Tuesday, June 14, 2011

Awww, Thanks! - Tiddly Inks Challenge

 Hi ya everyone!
  Don't ya just love simplifying life?  I like to make things simple so I can concentrate on family time and crafting - so when Christy asked us to simplify this week on the Tiddly Inks Challenge Blog and make a single layered card - I thought hmmmm...interesting and difficult!!!!!  How am I going to use all my gorgeous design papers????  Well I figured I'd start in PowerPoint and Create my whole card.
 I made borders and placed this cutey called Awww Thanks right in the middle!  I computer generated the sentiment as well and printed it all out on my laser printer.  I colored her first and then colored in portions of the border.
 I stamped the bit of scrolling above her and colored that as well.  Last but not least I went around with my gel pen and added little dots to her clothes and portions of the purple border and I was done!!!  I let my Copics do most of the work and I like the way it turned out.
 Christy has a great demonstration of printing out some cards from Tiddly Inks too - so make sure to check that out!   
Head over to the Tiddly Inks store and stock up on a few Tiddly's then head over to the challenge blog and give our one layer card a try!!!
Care about my Copics???


Wednesday, February 16, 2011

Simple Thank You - Crafty Creations Challenge


Hi ya everyone!  This week at Crafty Creations the fabulous Amy chose this weeks challenge - Thank you!  Great challenge right?  I love it - we all need thank yous in our stash and this really helps to beef up those NEED type cards!  The Stamp Fairy is sponsoring and oh my such adorable stamps.  She let the design team use a few!  This sweet little image found here was painted with Distress Inks...thought I'd try something different.
These are much harder to work with then Copics and I'm still learning.  I did turn to my Copics for his nose and foot pads.  Once I had him completely colored I fussy cut him and then used some cute Basic Grey papers from the stack Sugared.  They matched SO well the colors I used in the flowers (Worn Lipstick, Mahogany and Peeled Paint).  I  used my nestabilities and cut out pieces for the bear to rest on.
I added a tiny pink ribbon and stamped a Thank You sentiment from Inkadinkadoo with Walnut Stain and used the same to ink the edges of the sentiment and card.  Lastly, I made these tiny little flowers as embellishments!
Thanks for stopping by and check out our challenge at Crafty Creations!  You could win a prize from
The Stamp Fairy!

Thursday, December 30, 2010

Wintery Note - Meljen's Challenge


Hi Ya Everyone!
  This week at Meljen's Designs the challenge is to make a project that's Cold or Snowy!  Perfect sort of card for this time of year.  The new release is super cute too (click here):

I needed to make a few thank you notes and thought that these images would be perfect for just that.  I took my three favorites, Yeti Cocoa, Snow Bunny, and Cozy Winter Owl and colored them with my Copics. 

Next, I cut them out with my paper trimmer into 3 x 3.5 squares and used my corner round on the A2 cards and the images.  I had some navy blue ribbon that I wrapped and tied. 

I then used my cuddlebug and a snowflake diecut.  I topped the card off with my iRock and placed a few gems in the center of the added snowflakes. 

On the inside I stamped Thank You.  Easy cute cards!  Make sure to check out Whimsy for the new release and please play along in the challenge!  You have a chance to win some awesome digital stamps!
Hugs

Friday, October 8, 2010

Thank EWE!! - Paper Cutz Challenge Red, White and Black

Hi ya everyone!!
  This week at Paper Cutz we are challenging you to make a card with just red, black and white!!! Oh, I love this color scheme!  I chose to do something fun - and made a little sheepy shaped card.  I needed to make some thank yous from my little one's birthday party and thought these little black and white sheep would be perfect for the challenge too! 

I used the sheep from Just Because Cards.  I just added and extra wool and flipped it, so that it would be the top portion of my card.  I welded them together in my Gypsy and added all the little layers.  I also shrank another wool piece down to fit inside as a sentiment area. 

The card was cut in black, the wool in white! Very simple - I then added the sentiment from Just Because Cards too.  Once I had the pieces cut out I used my divine swirls folder to emboss the wool!  I popped the wool piece up on the outside. 

I added a bit of woolly red ribbon to the sheep's neck and stuck on googly eyes!  Thanks for checking out my project and don't forget to enter the challenge at Paper Cutz!!!
Enjoy!

Friday, July 30, 2010

A Thank You


Hi Everyone,
  I have a thank you to give to a great coworker who really did me a favor.  She's amazing - and I really appreciate what she did for me.  I decided to make her a little thank you bouquet.  I started with a peanut butter jar and washed it in the dish washer after removing the label.  I used brown vinyl (which I love by the way - this is my first time using it) and adhered a number of Thank Yous to the glass.  I used every thank you I could find on my cartridges! 

I filled the jar with m&m's and then used Stretch Your Imagination to make the birdhouse.  I was inspired by a card Jeannie Phillips did for the birdhouse with the branches - check her card out here.  I then cut out some birds on Create A Critter and Stretch your Imagination - and added everything to a straw or wooden rod.  Next, I took some pipe cleaners and twirled them around my fingers to also add. 

A quick project that I was able to finish in one night.  It also fits the criteria for the Fantabulous Cricut Challenge.  Make sure to check out their great site! 
Enjoy!