Hi everyone,
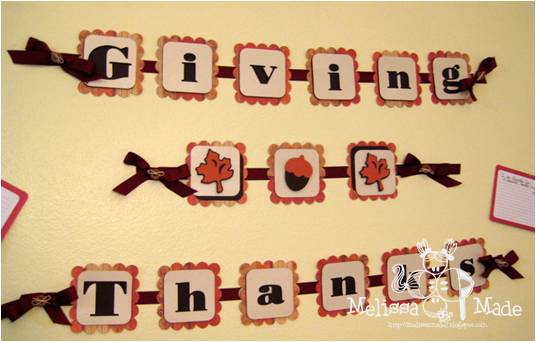
Anything goes at Paper Cutz this week - which was a blessing because I really wanted to make this for my house and my husband and I liked the idea of a new Thanksgiving Day tradition. I made a banner using my Gypsy, MiniMonograms and Cindy Loo font, an Acorn from Create A Critters and a maple leaf from Gypsy Wanderings.
I chose the scalloped square and plain rounded square from MiniMonograms and used the font from Cindy Loo.
This was inspired by Donna Mundingers Halloween banner found here. Once I had the blocks and letters cut out I popped the top layer off the bottom. I then used my ATG tape roller and taped all blocks to a maroon ribbon. I then tied bows with buttons looped with hemp twine and used a glue dot to stick them to the edge ribbons.
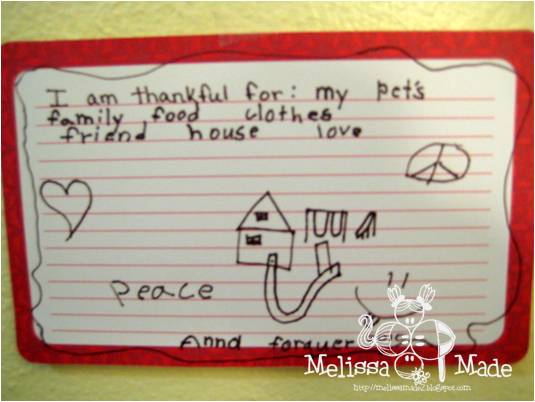
Finally, I found some recipe cards at Michaels for one dollar a set (20 cards). I wrote at the top - I'm thankful for: and each guest wrote what they were thankful for and hung it to the wall.
We will keep these and each year hang them up on the wall and ask our new guests to write what they are thankful for. This will allow us to remember our Thanksgivings and when hubby and I are old and gray we will have a number of cards to read and reminisce.
Hope your bellies have recovered!!! Mine is starting too! Don't forget to link your project over at Paper Cutz - there's no reason not too - it's anything goes!!!
Enjoy!
Hey everyone! Something a little different today!! I needed help with this little card and so I turned to the woman in the know when it comes to all things Gypsy - Sheila aka Shes A Sassy Lady! Therefore, we decided to post a little something together. Make sure to stop by her site and check out her amazing blog - all tutorials all the time - what could be better?
Enjoy!
This is so exciting we have our first joint endeavor at MelissaMade and Shes A Sassy Lady! This is Sheila aka SassyLady and I am going to introduce and ohhhh and ahhhh over this wonderful card that Melissa designed at MelissaMade. She will then take over with her tutorial and we will jointly post this for you; our followers. I did a video tutorial on the design itself as Melissa asked a question and I answered her question via this video and sent her the cut back. She took the cut and turned it into this beautiful card. I just love the papers she chose and will turn this over for her to add her wonderful comments and tutorial. I will jump back in at the end for more comments.
Hey everyone this is Melissa and I just have to tell you how excited I am to be here! I have been watching Sheila make these beautiful window cards and I had to make one for myself! However, try as I may, it wasn't happening. As you saw from the video I kept using an object instead of a frame. After a bit of frustration I emailed Sheila, the lady who knows how to make her Gypsy Lady strut her stuff! She fixed the problem and helped me to create this lovely window card. Now, on to the tutorial!
The paper was chosen before the design for the card. I had just received this new pack of Stampin' Up paper called Love Letter.
For the card base Sheila picked out something similar to what I wanted from Gypsy Wanderings. I love this shape and as you now know, it has a perfect frame built in. I also used Sentimentals for the bird. Once I got the file back from Sheila I decided to add a few layers for dimension. Here is a shot of my cutting mat with my chosen paper and a Gypsy shot of the extra layers I added.
I like a nice sturdy card base so I cut this in a nice thick black card stock. I then duplicated the front of the card in the red patterned paper. I adhered this red piece over the front using my ATG adhesive and a tiny bit of glue on the edges. I don't recommend glue for thin papers but I do like when my edges are adhered properly. So if you use a thinner paper use an adhesive runner or something you trust to not wrinkle your paper.
Next, I added the black polka dot paper for the bird shadow and layered the black scrolling paper for the bird. I added some black lines to the envelope. I adhered this just under the birds beak. I loved the look of the window card already but I didn't like the black background behind for writing a sentiment.
I decided to cut out a circle a bit larger then the window but keeping in the parameter of the card in the red patterned paper and added the cream circle just a smidgen bigger then the window on top of the red paper. I like the circle that shows under the window to be just a hair larger to ensure no black or red peek through. Next, I wanted to add my stamped sentiment and birds. I used my Studio G $1 clear stamps and a Versafine black ink pad. I was able to stamp one bird right through the front. However, the others took a bit more time and lining up. I also took into consideration how they would look inside the card.
Finally, I added some natural hemp twine to the edge with a cute little crown charm.
You know my favorite part of this whole card - once I had the design and help from Sheila it was SO easy and it turned out gorgeous! Thanks for your help Sheila - you rock that Gypsy Woman and I will definitely be making more window cards!
Well its Sheila again, look at the inside of this card, isn't it gorgeous. I am thrilled with the look. I know it is totally different from what Melissa usually makes but it is just as beautiful. I hope you get the opportunity to visit her on her blog and check out all the wonderful things things she has created.
Now please join me in welcoming Melissa as a Sassy Designer. She is such a talented lady that has recently started a new and successful blog and I was thrilled when she agreed to become a part of our Sassy Designer team! Melissa will make her first solo debut on Monday September 20. I sure hope you all come back and see the awesome project she cooks up for us.
Thanks for joining us today. Please be sure to leave Melissa plenty of sweet words of encouragement for this wonderful card she designed. I know she has inspired me to consider the inside of the card and what peeks through to complete a look or an effect. Awesome card Melissa!
Hi everyone,
I'm getting ready for a family vacation!!! YAY! We are headed to the Oregon coast for a week and a half. I'm a little worried though as our vacation house won't have WIFI. Hmmmm, not sure how to feel about that - but I'm sure we can find a spot at least a couple times for me to post. I will of course be taking some crafty items - but the beach is such a relaxing calming place for my husband and I that we will probably spend much more time out there then in the house. So if you don't hear from me for a little while, don't worry I'll be back with some new creations as soon as possible!
Now, on to the Jitterbuggin' Challenge. I used Sherri's sketch:
The rules for this challenge were to use the sketch, add some purple, have a cricut cut and to make a birthday card for a child. Great challenge because we all need to stock up on those birthday cards. This card was inspired by a good friends daughter. She dressed up as a little pink poodle for Halloween. The costume was adorable and made by her mom. Jen is very crafty, check out her blog here if you like layouts! Anyhow, all I could think about for this card was the poodle from Create A Critter.
I also cut out a bone from Create A Critter and welded on a bow from Gypsy Wanderings. I then cut out an extra bow to go on top of the welded one. I inked the bone with Close to cocoa from Stampin' Up. I used my Nesties for the circles and all paper was DCWV except for the solids which were Cricut papers. Once I pieced it together, I added a cute ribbon and lots of stickles to the bows and star on Happy Birthday. Finally, I added the gemstone swirls and three rhinestones to finish.
Enjoy!