Showing posts with label Give A Hoot. Show all posts

Tuesday, March 15, 2011

Love The Earth - Tiddly Inks Challenge

Hi ya everyone!  It's a new challenge today at the Tiddly Inks challenge blog!  I so love the variety of stamps at Tiddly Inks and as I was browsing the shop I found this ever so sweet boy giving the earth a big hug!  The image is appropriately called Hold me True and can be found HERE.  So when the challenge LUCKY ME (create a going green card) came up I knew he was perfect.  I colored him with my Copics.
I then pulled out my Gypsy and chose the Provo Craft cartridge called Give A Hoot.  It has so many cute environmental sayings and pictures.  I chose "Love The Earth" phrase and welded the shadow of the phrase to the earth on the same cart.  I then used a shadow for the card base and welded two together to form the card.  I chose some paper from Echo Park - Walk in the Park.
I love it because even the inside is sweet!   Isn't it cute and so perfect for this card.  All papers were from this stack actually.  I also used two of the flower stickers that came with it and put those next to the little boy.
I love the bright colors and the layout on this card!  I hope you enjoy it too.
Now for the Tiddly Inks challenge you can create a card/project that's GREEN in color OR GREEN as in environmental!  Head over to Tiddly Inks and pick up an image first - there are a number of freebies HERE.  Don't forget all the NEW Gothic Pinups too found right HERE.

Thursday, December 2, 2010

Birds of a Feather - Meljen's Design Sketch Challenge and Release


Hi ya everyone!
  This week at 
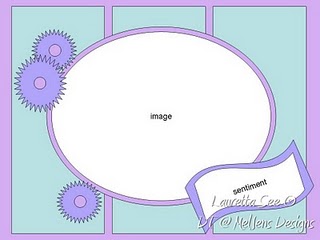
Meljen's Design we had a sketch challenge - I LOVE sketch challenges because it's so amazing how everyone can come up with something different even following the same basic layout!  Here is the sketch created by our very own DT member Lauretta See:


Isn't it fun?  Here are the adorable new release images too which can be purchased right here at Whimsy Stamps! 


I loved the little penguin with the bird called penguin's little friend.  I instantly thought of birds of a feather flock together! LOL - anyhow, I used Straight from the Nest for the flying bird.  I love splashes of red and with the blue Christmas stack from DCWV I knew the red would really pop.  I had that in mind while coloring my little penguin with my Copics.


This is a 5x7 card.  I layered my papers to match the sketch and cut my image out with my nestables.  I cut the flying birds out on my Expressions in various sizes and layered them, popping out one.  I also cut out this banner from Give A Hoot and stamped You Make My Heart Sing from a little Studio G $1 stamp set.  I popped the middle out and stuck the sides of the banner down flat to give it some dimension. 


I felt like my birds were a little big and I needed to balance the card out a bit so I added this snowflake embellishment and some little buttons with thread tied in little bows. 
Head over to Meljen's this week for the challenge!
Oh and have you heard the news??? Meljen's digitals can now be purchased already colored!!!!  This is awesome for those quicky cards that you need when you forget or are short on time!  They are adorable - here's a great example:


 Also, NEXT WEEK'S RELEASE IS TOO AMAZING!!!  YOU HAVE TO CHECK BACK FOR THAT RELEASE - IT'S ONE OF MY FAVORITES!!!
Enjoy!

Sunday, September 19, 2010

Feeling Groovy - Tickled Pink Monthly Sketch #5

Hi Everyone,
  I thought I would try the Tickled Pink Sketch Challenge this month.  I don't typically buy rubber and previously they had all rubber but right now they have a few of their awesome stamps as digi's.  If you don't have any you might want to go grab some!! Love them - might have to get them all! 

  I cut the shapes out of 1.33inch squares using my Gypsy.  I placed the shape - heart (Create a Critter), Flower (George) and peace sign (Give a Hoot) inside the square and cut them in three colors.  Next I layered each cut out on a colored square and then placed the peace sign back into those.  I inked all edges in Close to Cocoa.  I colored 60's Willow in Copics and used my nestables to cut her out. 

I then computer generated the sentiment and cut it out using my circle nestables. 

I added this fun peace ribbon that my 7 year old picked out and topped it off with a little bling, a few extra cut outs and a flower sticker.  I also added the background paper from DCWV the butterfly stack to the inside and put a piece of white paper inked on top and added a few of the left over cut outs. 
Make sure to check out the challenge! Thanks for looking!
Enjoy!

Tuesday, September 7, 2010

Hoppy Birthday Sheila!!!

Hey Everyone!
  Tomorrow is Sheila's Birthday - aka She's A Sassy Lady.  She is a wonderful inspiration and is always making the loveliest cards and layouts.  I'm so excited to give her this card.  Actually, it's already in the mail - but I have a feeling it's going to be a bit late!  So I'm giving it to her electronically here a day early so she won't think I forgot!! LOL  I made this card using her fabulous window technique using the Gypsy.  I found a perfect window with this scalloped edge on Mini Monograms.  Although, it had an extra window so I hid that.

 I took shadow letters from Nursery Rhymes and welded them together to spell Hoppy Birthday on the top and bottom of the window.  Finally, I attached the words with the little bunny shadow from Give a Hoot.  The balloon happened to fit right over the O in Hoppy!  I cut this all out and added an extra layer on the front.  The bunny was run upside down in my Xyron and I added some flocking to his belly and body.  Next, I added a bit of smooch on his mouth and gave him little black eyes and a nose.  I topped him off with a little rosy cheek using some chalk. 

I used a string instead of the cricut string for the balloon and popped the balloon over the O.  I also added all the letters to the top of the shadow.  The paper used was all Basic Grey - Cappella.  On the inside I placed a matching stripe and a black piece for a sentiment.  I wrote with my gelly roll pen on the inside!
Hoppy Birthday Sheila!!!
Enjoy!

Wednesday, August 18, 2010

Butterfly - Crafty Creations #81


Hey everyone!

This week at Crafty Creations we are challenging everyone to use a butterfly on their card, scrapbook page or project.  Our sponsor this week is Simon Says Stamp Store.  While on vacation I decided to make a bookmark and card set. The blues and soft sand colors inspired this set. I also stopped by the local Jo-Anne's while on vacation and picked up K & Company paper. It matched my linen paper from DCWV so well that I had to use the two to create something right away. The beachy inspiration led to me picking up my Gypsy and welding two butterflies from the Hannah Montana cart together. I also took the word Hope from Give a Hoot and welded that to the bottom of the butterfly. I had a hard time coming up with the sentiment - I thought fly or soar, but none really made sense. Finally, I settled on Hope since a butterfly seems to struggle so much when it flutters around!! It's almost as if it's flying around thinking - "I HOPE I make it to that flower" LOL.


Anyhow, I used the shadow images to weld all pieces on my card in a light cream and tan patterned paper from my DCWV stack. Next, I cut out a blacked out image of the butterfly in a flowery tan from the K&Co paper. Finally, I cut out a top lacy sort of layer for the butterfly from another piece of K&Co paper in a turquoise blue color that had a bit of foil. I cut the word Hope out in a DCWV paper that matched all papers tying in the colors.
For the bookmark, I cut out elongated tags from Tags, Bags, Boxes and More in the foil paper I mentioned before and the same cream and tan I used as a base for the butterfly card. Next, on my Gypsy I welded shadow letters from Nursery Rhymes and formed a little line of letters with the butterflies from Hannah Montana attached to those letters. I used the same paper I cut Hope out of to place on top of the shadow letters. The butterfly layers were done in a similar fashion to my card. Finally, I added a bit of ribbon for the top in a number of varieties. I liked the bookmark but felt it needed a little something extra so I added some pearls as well.

I hope you like and don't forget to play along this week at Crafty Creations!!!

Enjoy!