Showing posts with label Simply Charmed. Show all posts

Wednesday, October 12, 2011

A Booing We Shall Go - Treat Box and Card

Hi ya everyone!
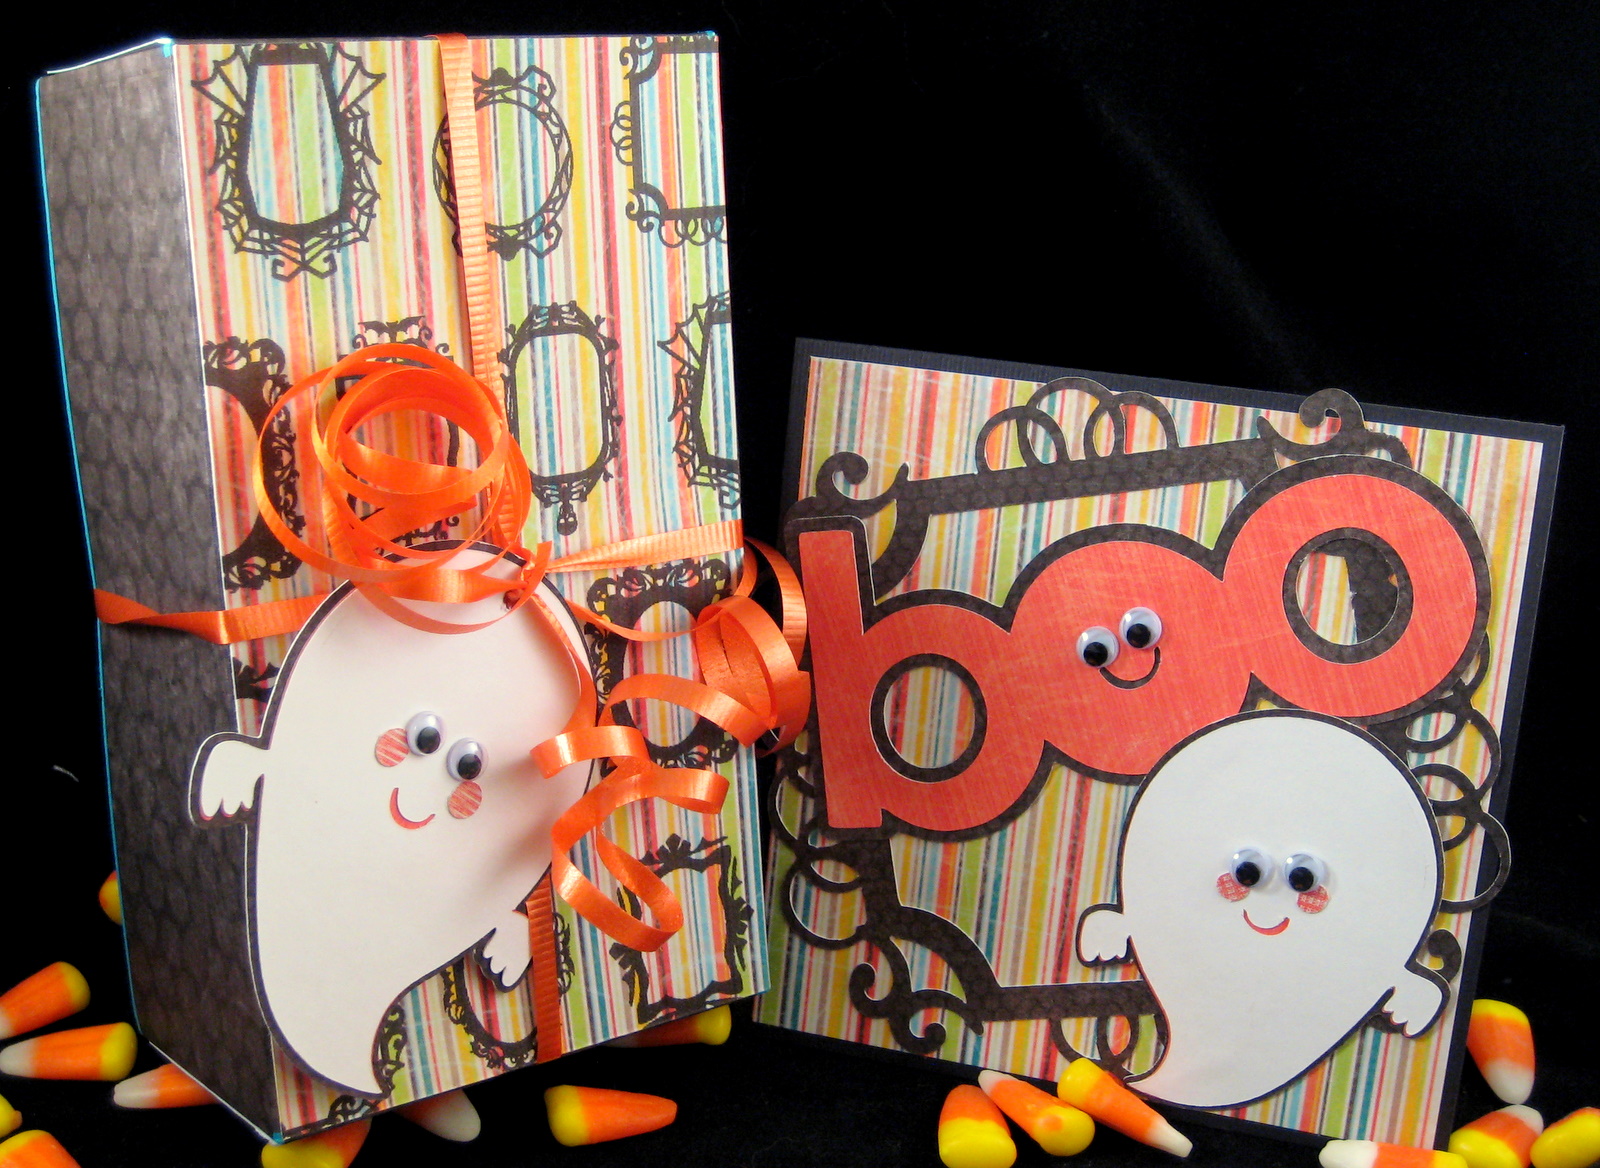
  It's my turn at Creative Critterz Imaginations!  I love this fun idea - I had never heard of this as I live in Portland and well leaving a package on someone's doorstep these days might get you a call from the police!!! No just kidding - really I love it and I can't wait to try it in my neighborhood.  Here is a simple video where I explain the sizes and cartridges used for this fun Boo gift!
Thanks for stopping by today!  If something was unclear please feel free to leave a question and I'll get back to you!  I also love to hear from you too - so any love is appreciated!  Have a fabulous day and for more fun projects visit Creative Critterz Imaginations!
Recipe
Cricut Imagine Cartridges:  Country Carnival and All Wrapped Up
Cricut Cartridges:  Happy Hauntings and Simply Charmed
Cricut Imagine
Cricut Craftroom
White Paper
Adhesive
Googly Eyes
Ribbon
Scissors
Scoreboard or scoring tool

Monday, August 1, 2011

Warm Wishes - Imagine

Hi ya everyone!
  This week on the Cricut Circle blog the weekly challenge is to use a technique that a design team member taught.  I chose to use my Copics following Michele Kovack's tutorial.  I also wanted to use my favorite Imagine cartridge as on the Circle community board there is a little challenge going to use your favorite cartridge.  I chose Imagine More Cards because it's new and I think it will be one of my new favs!!!  I also used the cartridge Simply Charmed!  If you aren't part of the Circle no biggie - there are lots of inspiring projects similar on the Cricut Blog!

Friday, April 8, 2011

Tweet Easter - Fabulous Inky Friday

Hi ya everyone!
  I love this new image at Tiddly Inks - Minnie's Egg digital stamp by Christy Croll at Tiddkly Inks is just too sweet holding that big old Easter egg.  If you love her but if you don't need to make an Easter card there is another Minnie in the shop HERE.  I saw a really beautiful mini album in one of my craft magazines that had an advertisement for Spellbinders and they used this above nestable for the album.  I loved the look and decided to modify it for a card.
I colored Minnie's Egg in Copics - I also included the colors I used.
and here are the Copics I used:
I cut her out with a different nestable I used and inked the edges in a Tim Holtz ink called Faded Denim.  I also used my colorless blender and placed some polka-dots on the large egg.  I then added white gel pen to her egg and also put a little squiggle on her glasses.  Then I glossy accented her glasses and added Stardust Stickles to her egg's dots.  I set her to the side to dry.
Last, I made this adorable frame from my nestables and used foam squares to pop it off the Echo Park paper with hearts.  I cut out some adorable little chicks and chick eggs from the cartridge Simply Charmed on my Cricut and adhered those to the frame.  I then stamped the sentiment Have a Tweet Easter on white paper and backed it with the same blue in the eggs.  I then placed Minnie in the frame and added the sentiment!  Head over to Tiddly Inks and check out their cute images today!

Friday, November 5, 2010

Caught A Bug? - Paper Cutz Challenge

Hi Ya Everyone!
  This week at Paper Cutz Mary asked us to design a get well card using a digital or stamped image or a cricut cut of something that flies.  I chose a lady bug mainly because I thought it would be cute with my sentiment.  This is an all cricut card.  I made a window card using Sheila's (aka She's A Sassy Lady) window card technique by following her Saturday morning Gypsy made simple tutorial.  I'm also going to link it up at her blog.
  First, I pulled out my Gypsy and found a card base from French Manor and stretched it to a 5x7.  I then added the sentiment caught and a from Simply Charmed (for both I had to get rid of other words using the hide feature) and adhered the shadow to the window frame.  Next, I typed up the word Bug? from the font on Rock Princess and again adhered the shadow to my window.  Finally, I added a ladybug from Create A Critter - I used the hide feature again and took out his happy smile.  I cut out a card base in a teal blue - this is my stronger heavier card stock that I like to use as a base to make the card sturdier. 

I also cut the base in a sheet from my DCWV Black Current stack because I wanted the front to be in black.  I then proceeded to cut out the shadows to all of my shapes and fonts along with the regular shapes in various papers.  I then adhered the card together using glue, pop dots and some runner adhesive - my xyron ran out :(!!!  I added a background piece from my K&Co. paper stack that brought the whole thing together - this covered up my window portion but I loved the effect!  Finally, I added some googly eyes and a bit of doodling with my white gel roll pen.  Thanks for checking out my card - if you can - head over to Paper Cutz this week and join the fun by making a get well card for your stash with a flying thing!!!
Enjoy!

Friday, October 22, 2010

BOO! - Paper Cutz Challenge!

Hi Ya Everyone!
  This week at Paper Cutz we would like to see you use some shapes - circles, stars, and, diamonds/crescents!  I had a bit of a hard time deciding what to do here - I thought wow that's a lot of shapes - but I went ahead and took a circle, star and crescent and welded the shadow of these shapes together on my Gypsy.  Instantly I thought candy bar wrapper!

 Don't ask me why - maybe because I'm always thinking about candy! LOL - anyhow, I then layered the word BOO! from Simply Charmed along with a grave stone and a little ghost from the same cart! This cartridge is so fun - reminds me a bit of Doodle Charms but the images are just too sweet.  Look at the face in BOO - isn't that adorable? 

I used a number of fun papers on the project - papers from Memory Makers Halloween.  I laid the star and circle flat then popped the crescent moon.  I also popped up the Boo.  The head stone was layered and place flat and the little ghost was popped up!  Finally, I added some crumpled ribbon - I am in LOVE with this ribbon - it looks beautiful no matter how you put it on! 

Although, I don't really want to tell you where I got it - because I know everyone is going to start buying from her and she'll have to increase her prices - BUT, (BIG SIGH) I guess I will share - Prairie Bird Boutique - ONLY $5 for a bundle of three colors!  It's gorgeous - my friend Nicole at Gotta Have Paper filled me in on the secret and My Craft Spot (who also sells the ribbon) has a great tutorial  on how to tie beautiful bows.  Now, don't forget to join in on the fun at Paper Cutz!!!
Enjoy!